Creating your own Plinko board game is a fun and rewarding project that combines DIY skills with the thrill of chance. Whether you’re looking for a party game, a way to teach probability, or just a fun weekend activity, building a Plinko board is a great choice. This guide provides a step-by-step approach to crafting your very own Plinko game, from material selection to the final exciting drop.
Gathering Your Plinko Board Game Materials
The first step in How To Make A Plinko Board Game is gathering your materials. Fortunately, the materials are readily available and relatively inexpensive. You will need:
- A sturdy piece of wood or thick cardboard for the board. Think plywood, particleboard, or even a repurposed picture frame backing.
- Dowels or pegs for the Plinko pegs. Wooden dowels are readily available at most craft stores.
- Small nails or brads to secure the pegs.
- A saw to cut the dowels and the board to the desired size.
- A measuring tape and a pencil for marking.
- Sandpaper to smooth any rough edges.
- Paint, markers, or other decorative materials to personalize your board.
- Plinko chips or small discs. You can use coins, buttons, or even small wooden circles.
- A container or slots at the bottom to catch the chips.
With these materials in hand, you’re ready to begin building!
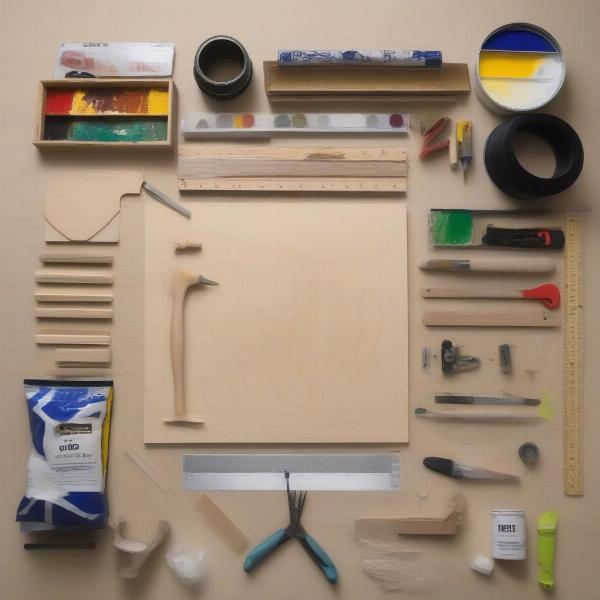 Plinko Board Game Materials and Tools
Constructing Your Plinko Board
Once you have all your supplies, you can begin constructing your Plinko board. First, measure and cut your board to your desired dimensions. A good starting point is a rectangular board about 2-3 feet tall and 1-2 feet wide. Next, mark the locations for your pegs. A staggered grid pattern is traditional for Plinko. Use your measuring tape and pencil to create evenly spaced rows and columns for your pegs. The spacing between pegs will determine the difficulty and randomness of the game. Closer pegs make it more challenging.
After marking, carefully drill pilot holes where you marked for the pegs. This will prevent the wood from splitting when you insert the pegs. Cut your dowels to equal lengths, ensuring they protrude from the board enough to deflect the chips, but not so much that they interfere with the chip’s descent. Then, insert the dowels into the pilot holes and secure them with nails or brads from the back of the board. Sand any rough edges or protruding nails for a smooth and safe finish.
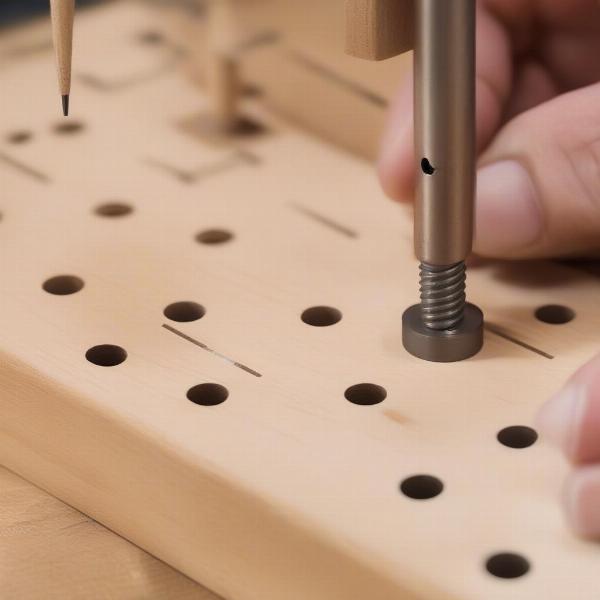 Drilling Pilot Holes and Placing Pegs on the Plinko Board
Adding the Finishing Touches to Your DIY Plinko Board
Now it’s time to personalize your Plinko board! Use paint, markers, or other decorative materials to add a unique touch to your game. Consider adding numbers or values to the bottom slots to create a scoring system. This could involve assigning higher points to the harder-to-reach slots. You can even theme your board around a specific event, holiday, or interest. A coat of varnish or sealant will protect your artwork and add a professional touch. Finally, attach a container or create slots at the bottom of the board to catch the chips and display the results of each drop.
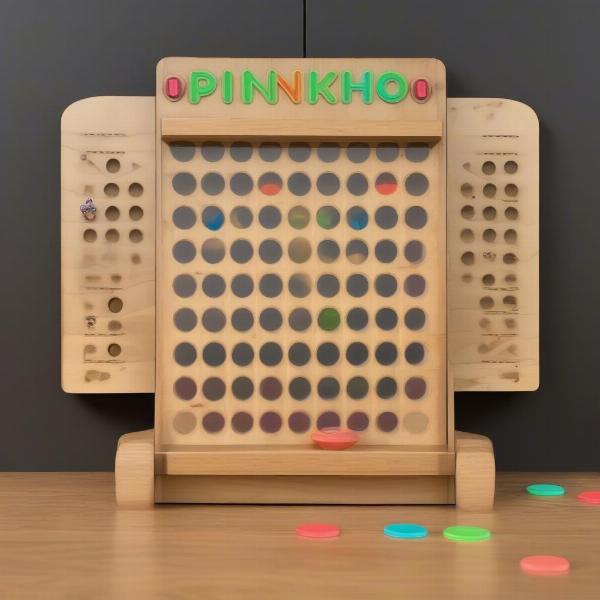 Completed DIY Plinko Board with Custom Design and Scoring System
How to Play Plinko
Playing Plinko is simple. Drop a chip into the top of the board and watch it bounce down through the pegs, eventually landing in one of the slots at the bottom. If you’ve assigned point values to the slots, tally up the points from each chip dropped to determine the winner.
Variations and Customizations
- Size and Shape: Experiment with different board sizes and shapes, such as circular or triangular Plinko boards.
- Peg Density: Vary the spacing between pegs to adjust the game’s difficulty.
- Obstacles: Add obstacles like bumpers or spinners to further randomize the chip’s path.
- Themed Boards: Create themed Plinko boards based on your favorite movies, TV shows, or games.
Frequently Asked Questions (FAQs)
-
What kind of wood is best for a Plinko board? Plywood or particleboard are good choices due to their sturdiness and affordability.
-
How many pegs do I need for my Plinko board? The number of pegs depends on the size of your board and the desired difficulty. Start with a grid pattern and adjust as needed.
-
What can I use for Plinko chips? Coins, buttons, or small wooden discs work well.
-
Can I make a Plinko board out of cardboard? Yes, thick cardboard can be used for a more lightweight and portable option.
-
How do I determine the point values for the slots? Assign higher points to the harder-to-reach slots for a more challenging game.
-
What if my dowels don’t fit snugly into the holes? You can use wood glue to secure them, ensuring they’re flush with the board surface.
-
Can I play Plinko outdoors? Absolutely! Just ensure your board is sealed to protect it from the elements.
Plinko: A Game of Chance and Fun
Building a Plinko board game is a fun and engaging project for all ages. With a little creativity and these simple instructions, you can create a custom Plinko game that provides hours of entertainment. So gather your materials and start building your own Plinko board today! Let us know in the comments below how your Plinko project turns out! Share photos of your finished board – we can’t wait to see your creations!