Want to share your epic gaming moments or create awesome content for your YouTube channel? Learning How Do I Record Myself Playing Video Games is the first step. This comprehensive guide will walk you through various methods, software, and hardware options to help you capture and share your gameplay like a pro. We’ll cover everything from simple screen recording to advanced setups for high-quality video.
Understanding Your Recording Needs: What Kind of Gamer Are You?
Before diving into the specifics, let’s define your recording goals. Are you a casual player looking for a quick and easy way to record short clips, or a dedicated streamer aiming for high-quality, professional-looking broadcasts? Your answer will guide your choice of recording methods and equipment.
Casual Gameplay Recording: Quick & Easy Solutions
For casual gamers, simple screen recording tools built into your operating system (like Windows Game Bar or macOS QuickTime Player) might suffice. These are easy to use and require minimal setup. However, their features might be limited.
Serious Gaming Recording: High-Quality and Advanced Features
Serious gamers, streamers, and content creators will need more robust solutions offering features like high frame rates (FPS), high bitrates, game audio capture, microphone input, and video editing capabilities. Dedicated software and hardware are essential here.
How to Record Gameplay: A Step-by-Step Guide for Different Platforms
Let’s explore several methods for recording your gameplay, catering to different needs and technical expertise levels.
Method 1: Using Built-in Recording Features (Windows Game Bar & macOS QuickTime Player)
-
Windows Game Bar: Press
Win + Gto open Game Bar. Click the record button to start recording. It’s straightforward for capturing short clips. -
macOS QuickTime Player: Open QuickTime Player. Go to
File > New Movie Recording. Select your microphone and start recording. Simple, yet effective for basic recording.
Method 2: Employing Dedicated Game Recording Software
Several dedicated software applications provide superior control and features compared to built-in options. Some popular choices include:
-
OBS Studio (Open Broadcaster Software): Free and open-source, OBS Studio is incredibly versatile. It’s perfect for streaming and recording, offering extensive customization and compatibility with various hardware.
-
XSplit Broadcaster: XSplit provides a user-friendly interface with advanced features like scene switching and overlays. While offering a free version, it mainly shines with its paid subscription offering more capabilities.
-
Action! by Mirillis: Action! is known for its ease of use and high-quality recordings. It’s suitable for beginners and professionals alike.
-
Bandicam: Bandicam is a powerful screen recorder often favored for its ability to record gameplay with minimal performance impact.
Method 3: Leveraging Console-Specific Recording Options
Modern consoles (PlayStation 5, Xbox Series X|S, Nintendo Switch) have integrated recording capabilities. These usually involve pressing a dedicated button to capture short clips or longer gameplay sessions. Check your console’s manual for detailed instructions.
Method 4: Utilizing Capture Cards for Professional-Grade Recording
For ultimate control and high-quality recording, especially for streamers, a capture card is indispensable. These external devices capture video and audio directly from your gaming console or PC, ensuring high-quality recordings with minimal latency. They usually require a bit more technical know-how to setup properly.
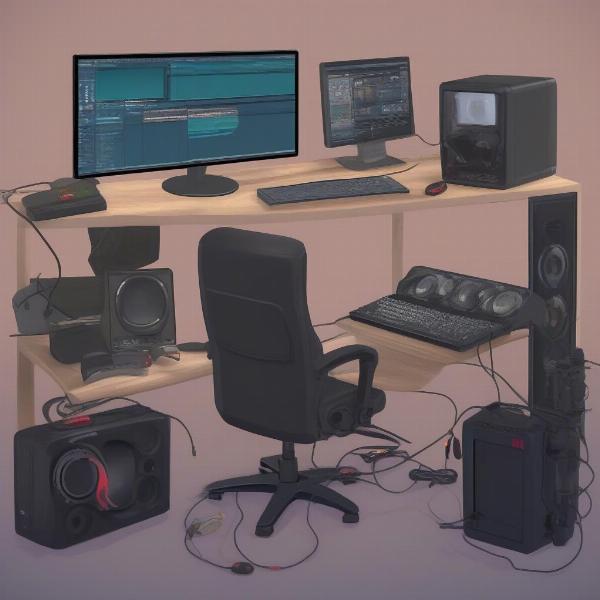 how-to-record-gameplay-setup
Optimizing Your Gameplay Recordings: Tips and Tricks
Now that you’ve recorded your gameplay, let’s enhance its quality and make it more engaging.
Optimizing Video Settings for Superior Quality
- Resolution: Record at the highest resolution your system can handle (1080p or 4K).
- Frame Rate (FPS): Aim for 60 FPS or higher for smoother gameplay.
- Bitrate: A higher bitrate results in better video quality but larger file sizes. Experiment to find a balance.
- Audio Settings: Use a quality microphone and adjust audio levels to avoid clipping or distortion.
Editing Your Gameplay: Adding Polish and Professionalism
Basic video editing can transform your raw footage into polished content. Use video editing software like Adobe Premiere Pro, DaVinci Resolve (free version available), or Filmora to enhance your recordings. Consider adding:
- Intro/Outro Sequences: Create visually appealing intros and outros to brand your content.
- Text Overlays: Add text to highlight key moments or provide commentary.
- Music and Sound Effects: Enhance the audio experience with relevant music and sound effects.
- Transitions: Use smooth transitions between different segments of your video.
“The key to great gameplay recordings is preparation,” says renowned gaming content creator, Ava Sharma. “Planning your shots, optimizing your settings, and editing your footage makes all the difference between amateur and professional-looking content.”
Choosing the Right Software for Your Needs: A Comparison
Selecting the right recording software depends on your budget, technical skills, and desired features. Here’s a simplified comparison:
| Software | Cost | Ease of Use | Features | Best For |
|---|---|---|---|---|
| Windows Game Bar | Free | Very Easy | Basic screen recording | Casual gamers |
| macOS QuickTime | Free | Very Easy | Basic screen recording | Casual macOS users |
| OBS Studio | Free | Moderate | Advanced streaming and recording capabilities | Streamers, YouTubers, advanced users |
| XSplit Broadcaster | Paid | Easy | User-friendly interface, advanced features | Streamers, content creators |
| Action! by Mirillis | Paid | Easy | High-quality recording, easy to use | Gamers seeking high-quality recordings |
| Bandicam | Paid | Moderate | High-performance recording, minimal impact | Gamers focusing on minimal performance impact |
 best-game-recording-software
Troubleshooting Common Issues: Addressing Recording Problems
Despite choosing the right software and equipment, some issues may arise:
- Low Frame Rate (FPS): Close unnecessary background applications and lower your in-game graphics settings.
- Audio Issues: Check your microphone settings and ensure the audio input is correctly configured.
- Lag or Performance Issues: Consider using a dedicated capture card or optimizing your recording software settings.
- File Size Issues: Experiment with compression settings to reduce file size without significantly compromising quality.
- Video Corruption: Ensure your storage drive has enough space and is not failing.
“Don’t be discouraged by technical glitches,” advises veteran game streamer, Ben Carter. “Troubleshooting is part of the process. Learn from your mistakes and keep experimenting until you find the perfect workflow.”
Beyond the Basics: Advanced Recording Techniques
Explore these advanced techniques to elevate your gameplay recordings:
- Multi-Camera Recording: Use multiple cameras to provide diverse angles and perspectives.
- Facecam Integration: Incorporate a facecam to add personality and engagement.
- Custom Overlays: Design and implement custom overlays to improve the visual appeal of your streams and recordings.
- Real-Time Editing: Learn how to perform basic real-time edits for smoother broadcasts.
- Live Streaming: Stream your gameplay to platforms like Twitch or YouTube Live to engage with a live audience.
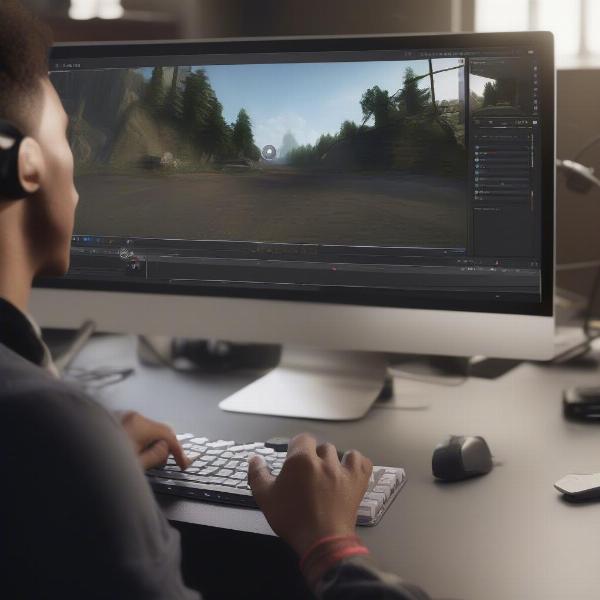 professional-gameplay-recording
Conclusion: Level Up Your Gaming Content
Learning how do I record myself playing video games opens a world of possibilities for sharing your gaming experience and building a community. Whether you’re a casual gamer or aspiring content creator, finding the right tools and techniques will empower you to capture and share your gaming adventures effectively. Experiment with different methods, optimize your settings, and don’t be afraid to try new things! Start recording today and share your epic gaming moments with the world!
FAQ
Q1: What is the best software for recording gameplay?
A1: The best software depends on your needs. OBS Studio is excellent for advanced features and streaming, while Action! is great for ease of use and high-quality recordings.
Q2: How do I improve the audio quality of my recordings?
A2: Use a high-quality microphone, position it close to your mouth, and adjust audio levels to avoid clipping or distortion.
Q3: How much storage space do I need for game recordings?
A3: It depends on the resolution, frame rate, and recording duration. High-quality recordings can consume significant storage space, so consider using external storage or cloud storage.
Q4: Can I record gameplay without a capture card?
A4: Yes, you can use built-in screen recording software or dedicated game recording software without a capture card.
Q5: What is the difference between recording and streaming?
A5: Recording saves gameplay to your computer for later viewing, while streaming broadcasts gameplay live to an audience.
Q6: How can I reduce the file size of my gameplay recordings?
A6: Lower the resolution, frame rate, or bitrate. Use video compression techniques to reduce file size without significant quality loss.
Q7: What are some good video editing software options for gameplay recordings?
A7: Adobe Premiere Pro, DaVinci Resolve (free version available), and Filmora are all popular choices offering varying levels of complexity and features.