Learning How To Draw Game Boy Advance Kirby is a fun and rewarding experience. This classic pink puffball has charmed gamers for generations, and capturing his simple yet expressive design on paper is easier than you might think. This guide will walk you through the process, from basic shapes to the final touches, so grab your pencils and let’s get started!
Getting Started with Your Kirby Drawing
Before we dive into the specifics of drawing Kirby from the Game Boy Advance era, let’s gather our materials. You’ll need a pencil for sketching, an eraser for corrections, and paper. Consider using a thicker paper if you plan to use markers or colored pencils later on. Having a reference image of GBA Kirby handy is also highly recommended. You can easily find these online. Remember, drawing is all about practice, so don’t be discouraged if your first attempt isn’t perfect. Just keep practicing, and you’ll be drawing Kirby like a pro in no time.
Drawing the Basic Shapes of Kirby
Begin by drawing a circle. This will be the base for Kirby’s body. Don’t worry about making it perfectly round; a slight oval shape is fine. Next, lightly sketch two smaller, slightly elongated ovals at the top of the circle for his feet. These should be placed symmetrically, a little less than halfway down the main circle. Now, add two small, rounded triangles for his arms. Position them on either side of the circle, slightly above the midpoint. Keep the lines light so you can easily adjust them later.
Adding Kirby’s Facial Features
Now for the fun part: giving Kirby his signature cheerful expression. Draw two large ovals for his eyes, placed high on the circle, slightly tilted inwards. Inside each eye, draw a smaller, filled-in circle for the pupils. These should also be slightly tilted to match the angle of the eyes. Next, draw a small, curved line below the eyes for his mouth. Remember, Kirby’s mouth is typically a simple, happy curve. To finish the face, add two small, rosy circles on his cheeks just below the eyes. This will give him that extra bit of charm.
Refining the Outline and Adding Details
Once you’re happy with the basic shapes and facial features, it’s time to refine the outline. Carefully go over your light sketch lines with darker, more confident strokes. Round out the edges of Kirby’s body, and give his arms and feet a more defined shape. You can also add small, curved lines to suggest the division between his arms and body. At this stage, you can also add details like the small indentations on his feet. These small details will make your drawing look more polished and professional.
Coloring Your Kirby Drawing
Now that you’ve completed the line art, it’s time to bring your Kirby to life with color! Traditionally, Kirby is a bright, cheerful pink. Use colored pencils, markers, or crayons to fill in his body with this signature hue. His cheeks are usually a slightly darker shade of pink. His eyes are a vibrant blue, and his feet are typically a reddish-pink. Don’t be afraid to experiment with different shades and coloring techniques to achieve the look you want.
Drawing Different Kirby Poses
Once you’ve mastered drawing Kirby in his standard pose, try experimenting with different poses and expressions! You can draw him inhaling, floating, or even using his copy abilities. Look at reference images from the Game Boy Advance games for inspiration. Remember, the key is to break down the pose into basic shapes and then build up the details. With a bit of practice, you’ll be drawing Kirby in all sorts of dynamic and exciting ways.
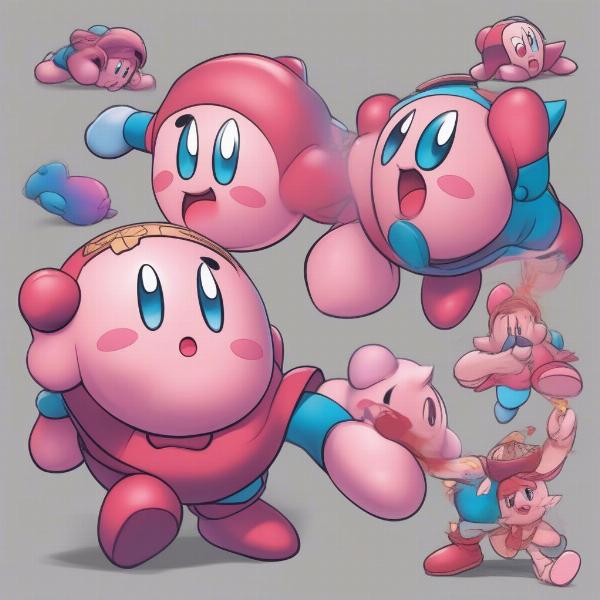 Kirby Coloring and Poses: Mastering the Art of Drawing
Tips for Drawing Game Boy Advance Kirby
- Use light lines for sketching: This allows you to easily erase and make corrections as needed.
- Start with basic shapes: Breaking down complex forms into simpler shapes makes the drawing process less daunting.
- Practice regularly: The more you practice, the better you’ll become at drawing Kirby.
- Don’t be afraid to experiment: Try different poses, expressions, and coloring techniques.
- Have fun! Drawing should be an enjoyable experience.
Related Techniques for Drawing Other GBA Characters
Learning to draw Kirby can be a great stepping stone to drawing other Game Boy Advance characters. Many characters in the GBA era have a similar simplified style that makes them accessible to beginner artists. Try applying the same principles of using basic shapes and focusing on key features to draw other characters from your favorite GBA games.
Conclusion
Learning how to draw Game Boy Advance Kirby is a journey of creativity and fun. By following these steps and practicing regularly, you’ll be able to bring this iconic character to life on paper. So grab your drawing supplies and start creating your own Kirby masterpieces! Remember, practice makes perfect. Keep drawing, and soon you’ll be a Kirby drawing expert!
FAQ
- What materials do I need to draw Kirby? You’ll need a pencil, eraser, paper, and optionally, coloring materials like colored pencils, markers, or crayons.
- How do I draw Kirby’s perfect circle? Don’t worry about perfection! A slightly oval shape works just fine for Kirby’s body.
- What are the key features to focus on when drawing Kirby? Focus on his large eyes, rosy cheeks, and simple, curved mouth.
- How can I draw Kirby in different poses? Look at reference images from the Game Boy Advance games and break down the pose into basic shapes.
- What other GBA characters can I try drawing? Try drawing other characters from the Kirby series or other GBA games with a similar art style.
- Where can I find reference images of Game Boy Advance Kirby? You can easily find reference images online through image searches.
- What if my drawing isn’t perfect? That’s okay! Drawing is all about practice. Keep practicing, and you’ll improve over time.